
YING-YANG
Brief:
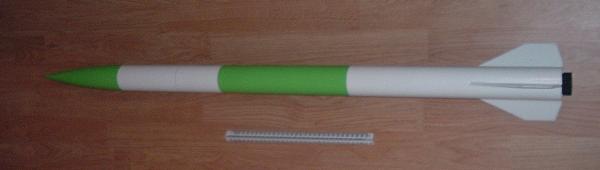
This is my first scratch built rocket; it is approximately 39” long and 2" in diameter. It will eventual have two interchangeable booster sections one with a 29mm motor mount and the other with a 38mm motor mount, this is to give me more flexibility depending on the flight level when launching the rocket.
Construction:
Construction is fairly basic and easy, and follows the construction methods and techniques used when building a standard rocket kit.
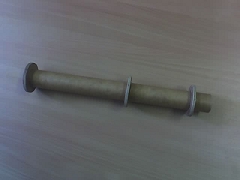
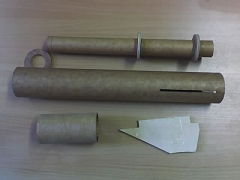
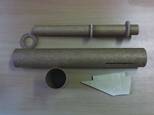
Components of 29mm booster section
Construction begins with assembling the motor mount. Consisting of an 11” length of 29mm motor mount tube and three home-made centering rings which are epoxied to the motor mount see above pictures.
Whilst the epoxy is curing, you can cut the slots in the body tube for the fins. I did this using a small hobby drill fitted with a cut off wheel; I found this much easier than using a sharp hobby Knife.
Next, I test fitted the motor mount into the body-tube, Sanding the outer edges of the motor mount centering rings if needed, When your happy install the mount using 30 min epoxy.
Next I installed the fins through the slots and epoxy onto the motor mount tube. I used a fin alignment guide which I got with my BSD Sprint to align the three fins. After the fins have set, fin fillets are added to the body tube fin joints.
Next the payload section is assembled using the other piece of 3” tubing, coupler, bulk plate and eye bolt.
Finishing:
I applied 2 coats of white automotive primer, (from Halfords) with a light sanding between each coat.
The rocket was then finished in white and green automotive spay paints.
Flight: Not Flown Yet |
|
Flight : |
|
|
|
|
|