
For rockets upto K Power
My Launch Pad
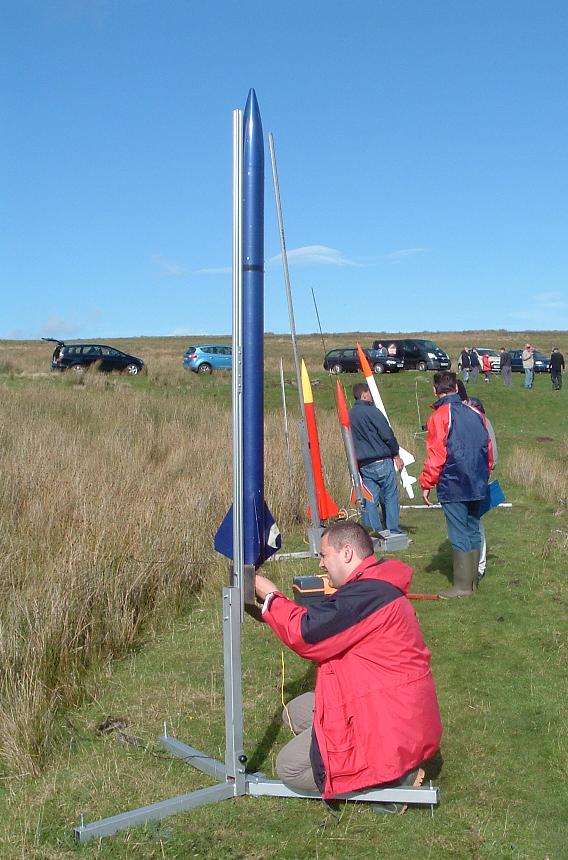
There are a number of good rocket launch pads on the market at the moment, but due to their cost. (I don’t even want to think how much their postage would be). I decided to have a go and make my own.
I thought about what I wanted the pad to do. So came up with the following list for the launch pad specs:
The first thing I wanted out of my pad was to make it easy to fold up and transport in the boot of my car.
Second I wanted it to be future proof in that it needs to be able to take the larger level 2 rockets.
Third there must be an easy way to load the rocket onto the rail.
Forth I wanted it to be cheep to make.
________________________
Materials List
3 Meter length of 50x50mm box section mild steel
2 x 1 Meter lengths of 30x30 rail
1 Meter length of 50 x 5mm flat bar mild steel
3 x 70mm M8 bolts + nuts & washers
1 x 150mm length of M8 mild steel rod
2 x 100mm M6 bolts + nuts & washers
Tools required
Welder
Electric drill
HSS Drill Bits (Various sizes)
Hacksaw
Centre punch
Hammer
Selection of Files
Construction
I started by cutting three 75cm and one 80cm length from the 50x50mm box section
I then cut four 17.5cm lengths from the flat Bar
I then took two of the lengths of flat bar (Component A) and measuring 2.5cm in from each end I drilled a 8mm hole.
Component A |
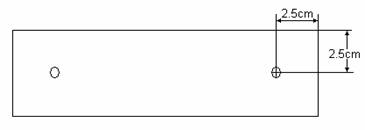
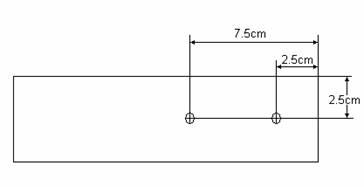
I then took the other two lengths of flat bar (Component B) and measured 2.5cm and 7.5cm in from one end again I drilled two 8mm holes.
Component B |
I then welded the two lengths of flat bar (Component A), one on each side of the 80 cm long length of box section, 5 cm in from one end and at right angles to the box section.
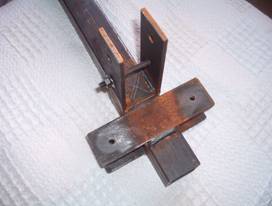
I then welded the other two lengths of flat bar (Component B) again one on each side of the 80cm length of box section and at 90o to the first two pieces of flat bar. See Picture 2
Picture 2 |
I then took the three 75cm lengths of steel and drilled a 8mm hole centeraly 2.5cm in from one end of each.
I then fitted two of the 75cm lengths inbetween the the two component A parts that had been welded previously and secured in place with 8mm nut and bolts.
next the remaining 75cm length was fitted inbetween the two component B, the bolt shown through the two component 2 parts in picture 2 is where the previously drilled 8mm hole is to be situated, i then lifted the length of box section so it was vertical and drilled another 8mm hole through the box section, this is where the bolt goes to secure the launch rail in the vertical position.
next was to attach the launch rail to the vertical section of the pad, this i did by drilling two 6mm holes throught the rail and through the box section and then bolting the rail to the pad with 100mm x 6mm nuts and bolts.
I then painted the hole pad (minus the rail) with two coats of silver hammerite. see above picture.